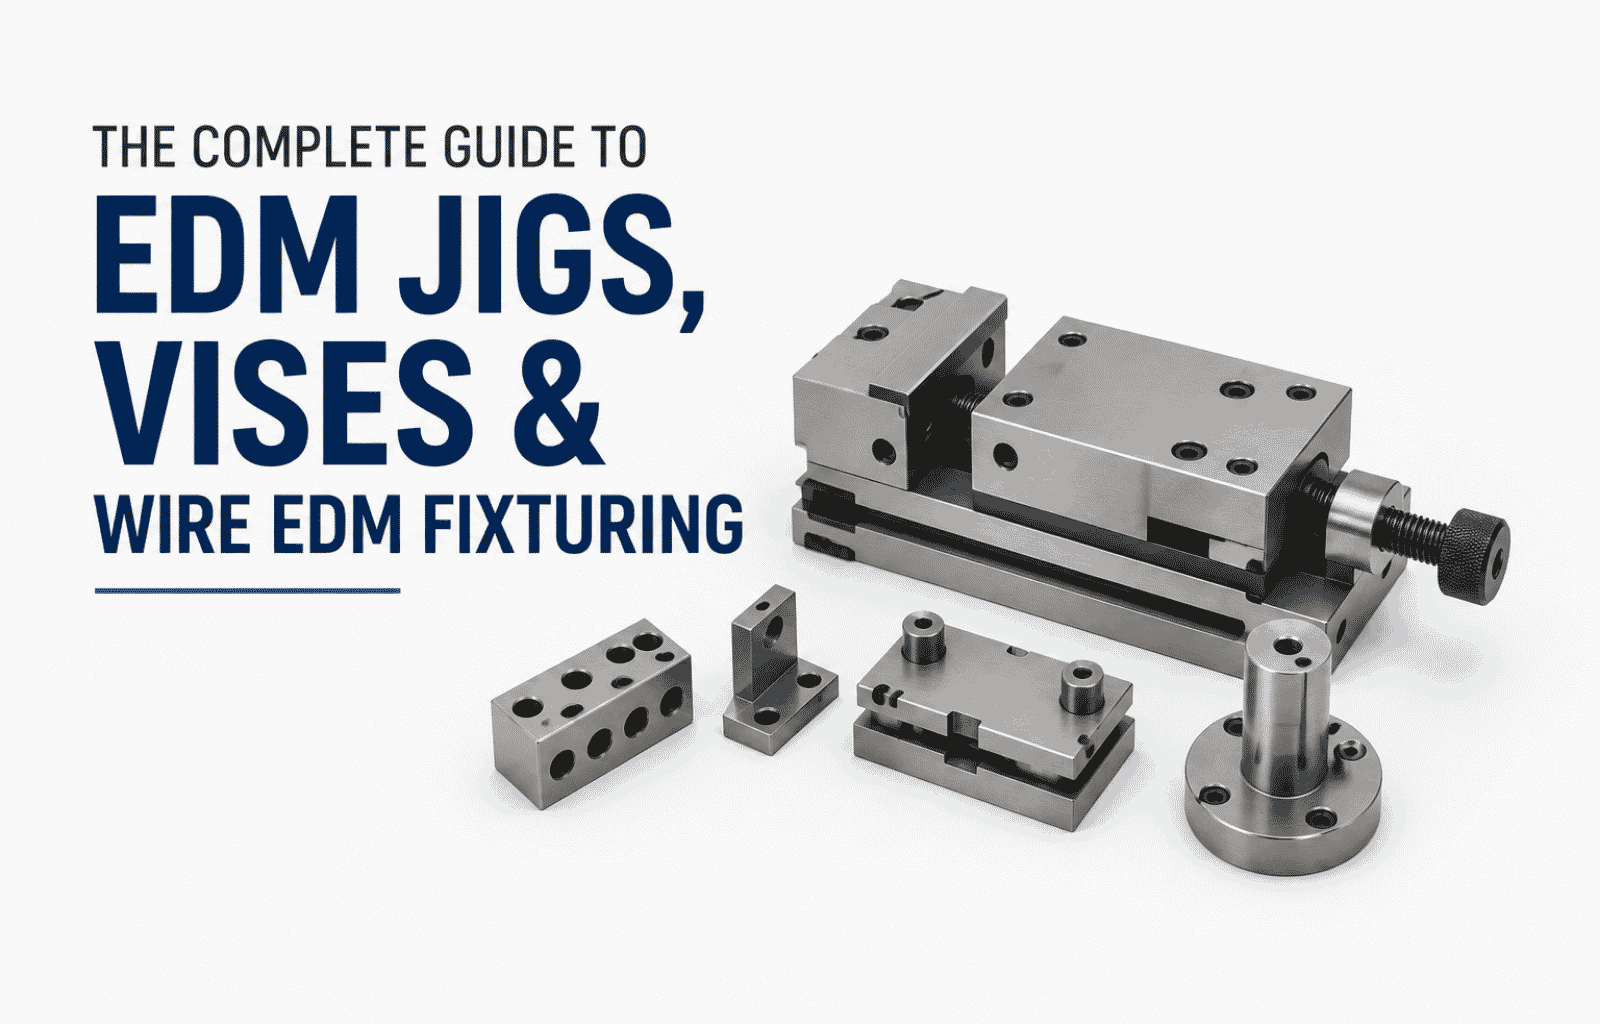
Electric discharge jigs, vises, and wire EDM fixturing are workholding tools that grip your part in place during EDM cutting. They keep the workpiece steady, aligned, and repeatable. Good fixturing cuts setup time, reduces scrap, and helps you hit tight tolerances—often within ±0.0002 inches.
Your wire EDM machine can cut to micron-level accuracy. But if your part shifts even slightly during the cut, that accuracy is lost. The problem is rarely the machine. In most cases, it's the fixturing.
Poor workholding leads to alignment errors, wasted material, and long setup times. Every re-alignment eats into your production hours. Every misaligned part becomes scrap.
Featured Products
This guide breaks down the tools that solve this: jigs, vises, and fixturing systems for electric discharge machining. You'll learn how they work, how to pick the right ones, and how to keep your setups fast and accurate. Whether you run a small tool room or a large production shop, the right fixturing pays for itself quickly.
What Are Electric Discharge Jigs, Vises, and Wire EDM Fixturing?
These are the tools that hold your workpiece during EDM cutting. Each does a specific job:
- Jigs locate and position the part precisely. They guide where the cut happens.
- Vises clamp the part with steady, even pressure. They stop movement during the cut.
- Fixturing systems combine base plates, clamps, and locators into a repeatable setup.
Here's why this matters. EDM is a non-contact process. The wire never touches the part—it uses controlled electrical sparks to erode the metal. So there's no cutting force pushing the part around. But that doesn't mean the part stays put on its own.
Flushing pressure, wire tension, and tiny vibrations can all shift a loose workpiece. When that happens, your cut drifts off target. Solid fixturing keeps everything locked in place from the first spark to the last.
You can explore a full range of electric discharge tools to see how these pieces fit together in a real setup.
Understanding Electric Discharge Machining (EDM)
Before you fixture a part, it helps to know how EDM cuts in the first place.
How does EDM actually work?
EDM removes metal using electrical discharges—sparks. A charged electrode or wire sits close to the workpiece, separated by a dielectric fluid. When voltage builds up, a spark jumps the gap and melts away a tiny bit of metal. Repeat this thousands of times per second, and you get a precise cut.
The process uses direct current (DC). The fluid flushes away the eroded material and keeps the cut clean.
Why choose EDM over traditional machining?
EDM solves problems that milling and grinding can't. Here's where it wins:
- No mechanical force. The wire never touches the part, so there's no pressure to bend or distort delicate pieces.
- No burrs. Cuts come out clean, which saves hours of secondary finishing.
- Cuts hardened metals. EDM works on any conductive material, including hardened steel, titanium, and Inconel.
- Extreme precision. Tolerances of ±0.0002 inches and mirror-like finishes are standard.
The trade-off? EDM only cuts conductive materials, and it's slower than CNC milling. For high-precision work where failure isn't an option—aerospace, medical, mould and die—that trade-off is worth it.
The Role of Jigs in EDM Operations
The problem: line up a part by hand for every cut, and small errors creep in. One setup might be off by a fraction. The next might be off in a different direction. Multiply that across a batch, and your consistency falls apart.
Jigs fix this. A jig holds the part in one exact position, every single time.
What jigs do for accuracy
A well-made jig gives you three things:
- Repeatable positioning. Load part after part in the same spot with no guesswork.
- Faster setup. Skip the manual alignment on every piece.
- Fewer errors. Less human handling means fewer mistakes.
Types of jigs used in EDM
Jigs range from simple to advanced. Common types include:
- Single-part jigs for one workpiece at a time.
- Multi-part jigs that line up several pieces for automated, back-to-back cutting.
- Custom jigs built for complex or unusual part shapes.
Here's the payoff with multi-part jigs. Say each piece takes five minutes to cut. A jig holding five pieces lets the machine run all of them automatically. That frees your operator for 25 minutes to work on another job. Less manual labour means lower cost per part.
Browse the electric discharge jigs range to match a jig to your workpiece.
Wire EDM Fixturing Explained
Wire EDM uses a thin, electrically charged wire fed continuously through the part. It cuts intricate profiles that traditional tools can't touch. But the wire is fragile, and the cut is precise—so how you hold the part matters more than ever.
Why proper fixturing is critical in wire EDM
Good wire EDM fixturing does three jobs at once:
- Keeps the part stable against flushing pressure and wire tension.
- Leaves clear space for the wire to travel through the cut.
- Lets you load and unload parts fast for repeat runs.
Without it, you get drift, scrap, and constant re-alignment.
Common fixturing challenges (and how to solve them)
- Problem: the part shifts mid-cut. Cause: uneven clamping. Fix: use a vise with even, stable clamping force across the whole part.
- Problem: the wire hits the fixture. Cause: not enough clearance. Fix: design the fixture with room for full wire travel.
- Problem: slow batch changeovers. Cause: manual reloading. Fix: use modular or multi-part fixtures for automated runs.
You'll also want clean cutting wire for consistent results—stock up on electrode wires and matching filters for cutting wires to keep the process running smoothly.
Vises for EDM: Selection and Application
The vise is the workhorse of EDM fixturing. Pick the wrong one, and every other step suffers.
How to choose the right wire EDM vise
Match the vise to your job using these seven factors:
- Precision and parallelism. Look for high jaw parallelism, accurate squareness, and precision-ground surfaces. Small deviations cause big positioning errors.
- Corrosion resistance. EDM runs in dielectric fluid. Choose stainless steel or treated surfaces that hold up in wet conditions.
- Clamping stability. The vise must hold even, steady pressure without deforming thin or delicate parts.
- Correct size. Match the jaw opening to your part. Too big limits access; too small hurts stability.
- System integration. The vise should mount cleanly onto base plates, modular fixtures, magnetic chucks, or zero-point clamping systems.
- Versatility. A good tool maker vise works across wire EDM, surface grinding, and inspection—so you buy fewer tools.
- Repeatability. Consistent positioning across setups means less re-alignment, less scrap, and faster inspection.
Best practice for secure clamping
Clamp firmly, but don't over-tighten. Too much force can deform precise parts. Aim for even pressure across the full contact surface, and check that the part sits flat before you start the cut.
Design Considerations for EDM Fixturing
A fixture is only as good as its design. Get these three things right.
Material selection
Your fixture material affects accuracy and lifespan. Common choices:
- Stainless steel — hard, corrosion-resistant, and stable in dielectric fluid. A reliable default.
- Aluminium — lightweight and easy to machine. Good for quick or custom fixtures.
- Graphite — used mainly for electrodes rather than clamping parts.
Match the material to the job. For long-term production in wet conditions, corrosion resistance wins.
Thermal stability and accuracy
EDM generates heat. If your fixture expands or shifts with temperature, your accuracy drops. Choose materials with good dimensional stability, and let parts settle to a steady temperature before precision cuts.
Designing for complex shapes
For intricate parts, plan the fixture around the wire path. Leave clearance for the wire, support the part evenly, and avoid clamping points that block the cut. A custom fixture built from stable metal materials often solves problems that off-the-shelf tools can't.
Practical Tips for Improving Fixturing Efficiency
Small changes here save real hours. Here's how.
Nail your alignment
- Use a dial gauge to check squareness before every batch.
- Locate parts against a fixed reference edge, not by eye.
- Recheck alignment after any tool change.
Cut your setup time
- Use modular fixtures so you swap parts, not whole setups.
- Standardise your base plates and mounting interfaces.
- Keep a repeatable, documented setup for recurring jobs.
Common mistakes to avoid
- Over-tightening the vise. This bends precise parts.
- Skipping corrosion-resistant tools. Rust ruins accuracy over time.
- Ignoring wire clearance. The wire will hit the fixture and stop the cut.
- Manual alignment on every piece. This is slow and error-prone. Use jigs instead.
Maintenance and Durability of EDM Fixtures
Your fixtures work in wet, demanding conditions. Neglect them, and accuracy fades. Here's how to keep them sharp.
Keep jigs and vises in top condition
- Clean off dielectric fluid and debris after each use.
- Dry metal surfaces to prevent corrosion.
- Store fixtures in a dry, protected space.
- Check parallelism and squareness on a regular schedule.
A little grease on moving parts prevents wear and sticking—keep quality greases on hand for routine care.
When to replace or upgrade
Retire a fixture when:
- Parallelism or squareness drifts out of tolerance.
- Corrosion pits the clamping surfaces.
- Setup takes longer because the tool no longer locates reliably.
If you're scaling up batch production, upgrading to modular or zero-point systems often pays back fast in saved setup time.
Making Your EDM Setup Work Harder
Precise fixturing isn't a nice-to-have. It's the difference between a part that passes inspection and one that becomes scrap. The machine sets the ceiling for accuracy—your jigs, vises, and fixtures decide whether you reach it.
Here's where to start:
- Audit your current setups. Time how long alignment takes and count your scrap rate.
- Fix the weakest link. Usually it's a worn vise or manual alignment.
- Standardise for repeat jobs. Modular fixtures and documented setups cut hours over time.
Get these right, and you'll cut faster, waste less, and hit tighter tolerances with less effort.
Ready to upgrade your setup? Explore DK Tooling's full range of electric discharge tools for jigs, vises, electrode wires, and more—with bulk pricing and fast delivery across Delhi NCR and North India.
Frequently Asked Questions
What is a wire EDM vise used for?
A wire EDM vise holds a workpiece securely during EDM cutting. It keeps the part aligned and steady so the cut stays accurate, even against flushing pressure and wire tension.
Can a tool maker vise be used for wire EDM?
Yes. Many tool maker vises work well for wire EDM. Their high precision, compact size, and excellent parallelism make them a good fit—and they double for grinding and inspection too.
What is the best material for EDM fixtures?
Stainless steel is the most reliable choice. It resists corrosion in dielectric fluid and stays dimensionally stable. Aluminium suits lightweight or custom fixtures, while graphite is mainly for electrodes.
How does fixturing reduce EDM production costs?
Good fixturing cuts setup time and enables automated multi-part runs. If a machine cuts five parts on its own, your operator is free to work elsewhere. Less manual labour and less scrap mean a lower cost per part.
Why do wire EDM vises need corrosion resistance?
Wire EDM runs inside dielectric fluid. Without corrosion resistance, a vise degrades over time, which hurts both accuracy and lifespan. Stainless steel and protective surface treatments prevent this.
What's the difference between an EDM jig and a vise?
A jig locates and positions the part precisely for repeatable setups. A vise clamps the part with steady pressure to stop movement. Most accurate setups use both together.